Follow these steps to easily set up the access point (auto WDS):
Step 1. Configure the access point (WDS):
- change the device’s default IP address (can be static or dynamic);
- enable IP alias (secondary IP), if necessary;
- the default IP address field can be left empty because it is used for device management.
- NFT 2N wireless mode is set to Access Point (auto WDS) and it cannot be configured;
- select IEEE mode:
- N, if 802.11n-capable radios are used;
- B/G/N mixed, if legacy radios are also used in the network;
- set Channel to Auto.
- NFT 2N wireless mode is set to Access Point (auto WDS) and it cannot be configured;
- select IEEE mode:
- N, if 802.11n-capable radios are used;
- B/G/N mixed, if legacy radios are also used in the network;
- set Channel to Auto.

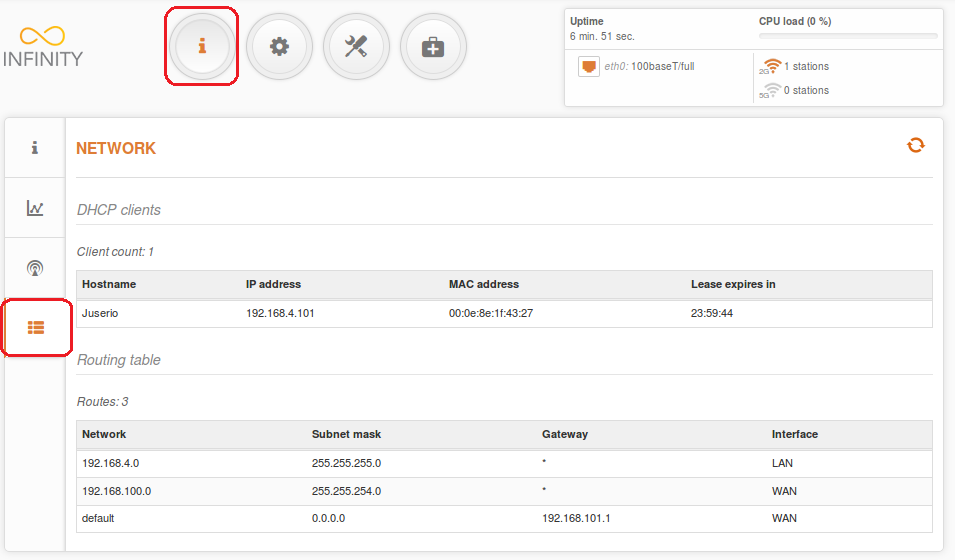
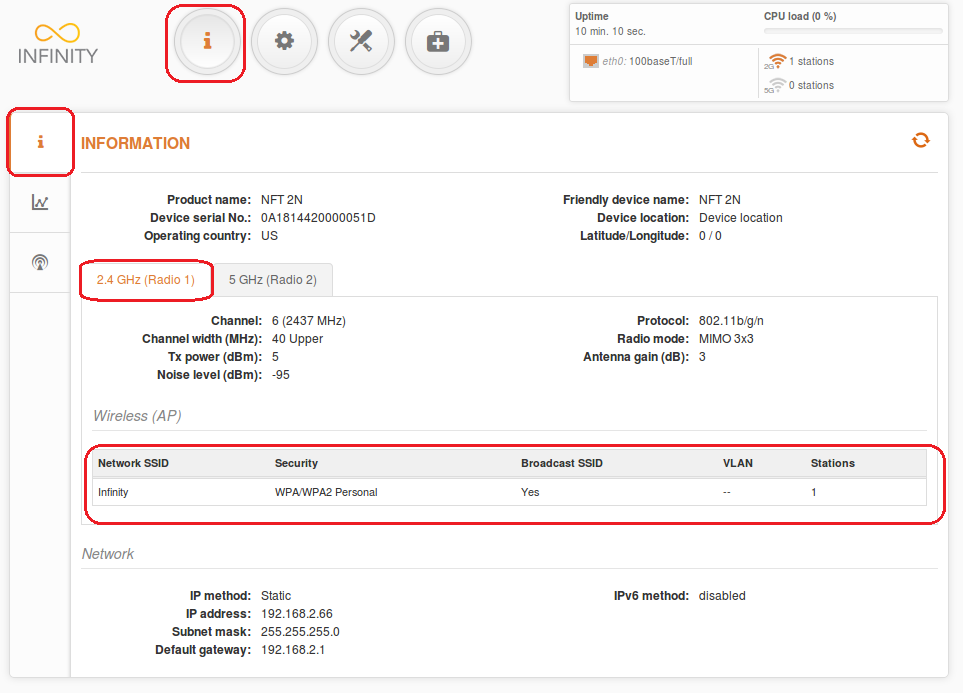
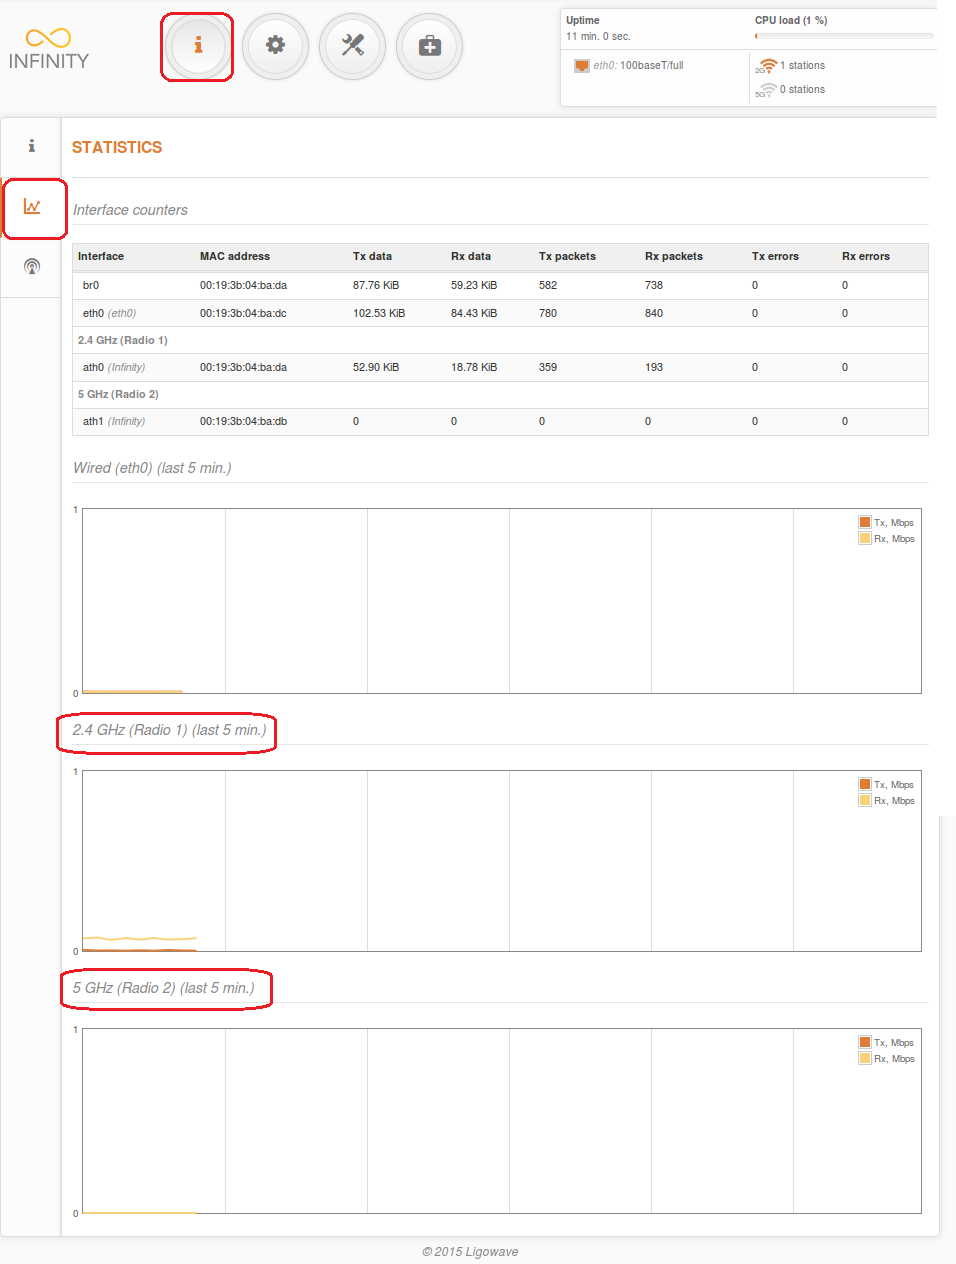
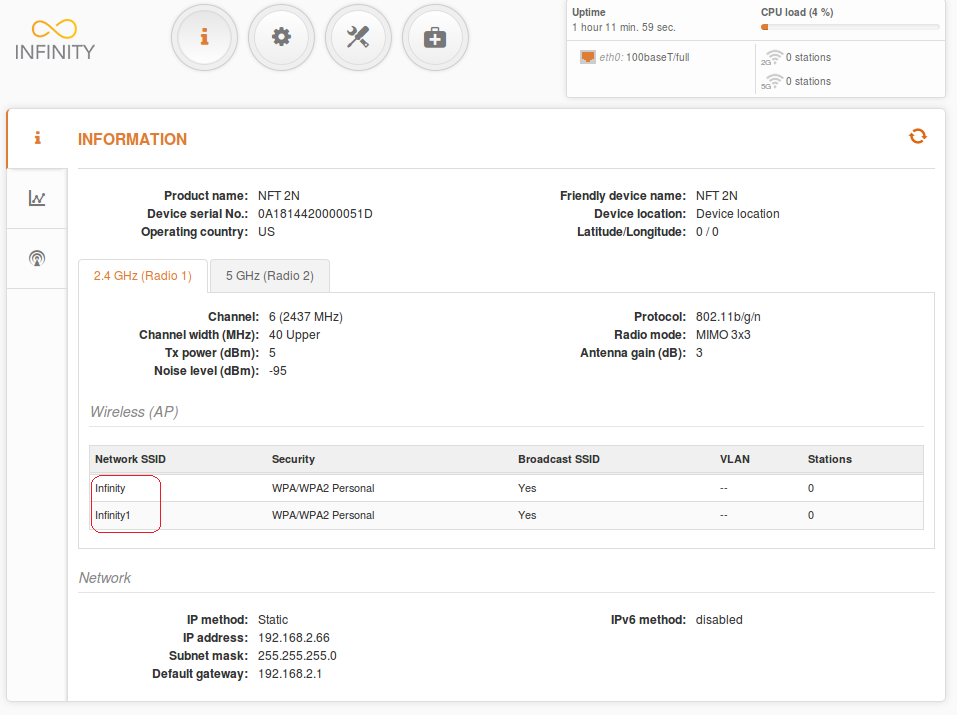
The Information page provides a brief summary of the device’s status information. It displays information such as wireless operating mode, radio, and network settings. Use the Information page (can be found under Status > Information) to view how many clients are connected over 2.4GHz.
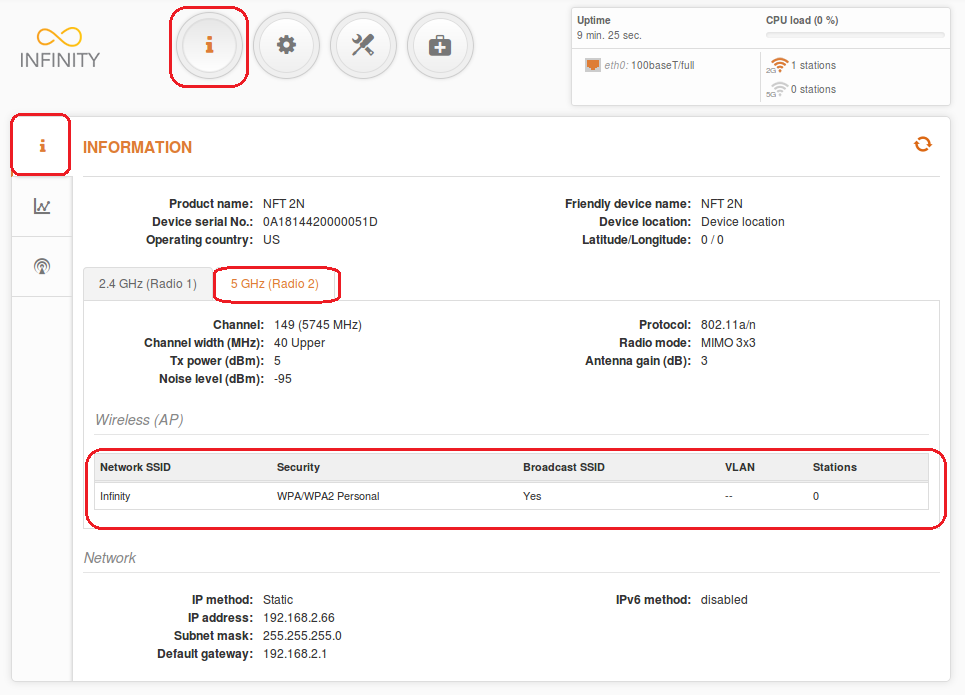
Use the information page (can be found under Status > Information) to view how many stations are connected over 5GHz.
The Statistics page is divided into two sections. It displays network interface counters and traffic graphs of wired and wireless interfaces. For detailed statistics, navigate to Status > Wireless.
The Interface counters section provides a table of interface statistics. The SSID is displayed in brackets near the radio interface (and VAPs). The wired and wireless interface graphs display real-time data traffic.
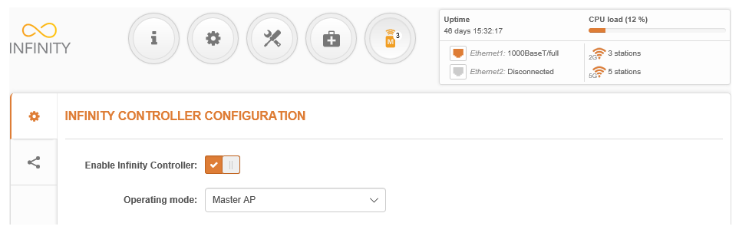
Integrated Infinity Controller: Master AP
Select the Master AP operating mode to create an Integrated Infinity Controller system. The Master AP mode is responsible for the configuration of new devices installed onto the network right out of the box. Once configured, the Master AP will automatically apply its configuration to each Managed AP within the same network. Once the Managed AP connects to the network, it automatically appears on the Master AP’s UI. The AP can be found in the table of Managed APs on the Controller page. This is where users can also change individual settings for each managed AP.
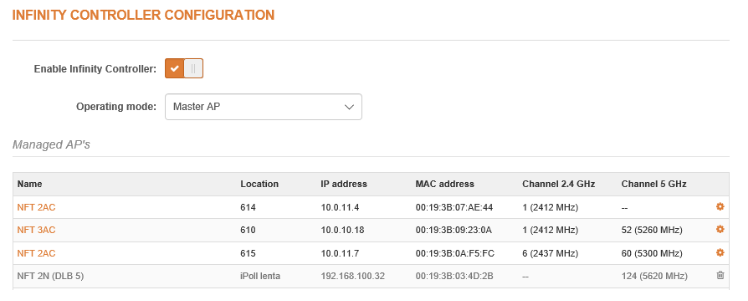
It is also possible to change some of the parameters of each Managed AP individually. To do so, click on the configuration icon.
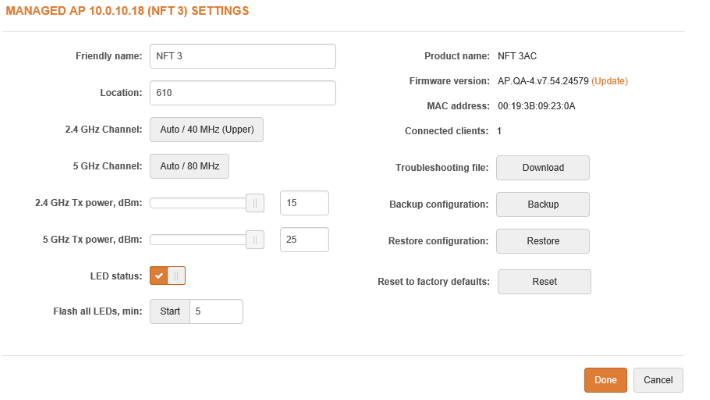
- Friendly name – a meaningful name for identifying the device.
- Location – description of the physical location of the unit.
- Channel – indicates the channel that the AP is operating on and whether the auto-channel function is switched on. Click the button for channel configuration options.
- Tx power, dBm – allows users to control the unit’s transmitting power.
- LED status – allows users to enable or disable all LEDs. If disabled, LEDs will not light up on the unit.
- Flash LEDs – use this function to identify particular units. Once enabled, all unit LEDs will flash for 5 minutes (changeable parameter), thus helping users to identify the location of the unit in the area.
- Connected clients – displays the number of clients connected to a particular Managed AP.
- Troubleshooting file – generates and downloads a troubleshooting file, which includes the device’s status information that may help to resolve support issues.
- Backup configuration – click to download the current configuration file. The configuration file is useful in restoring configuration settings in case of a device misconfiguration or when uploading a standard configuration to multiple devices without the need to manually configure each device through the web interface.
- Restore configuration – click to upload an existing configuration file onto the device.
- Reset to factory defaults – click to restore the unit’s default factory configuration.
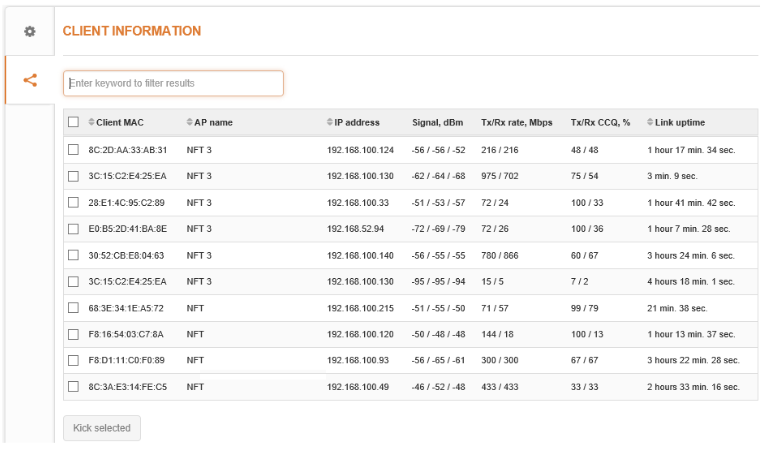
View wireless clients connected to each master AP and Managed APs by navigating to Controller > Client Information.
Virtual AP
Navigate to Settings > Wireless Configuration > Add Virtual AP to create up to 7 additional Virtual AP interfaces. A Virtual AP defines a logical wireless network. The NFT 2N can be configured to provide 7 additional wireless networks on each device radio. All of the VAPs may be active concurrently, which means that the client devices can associate with devices using any VAP SSID.
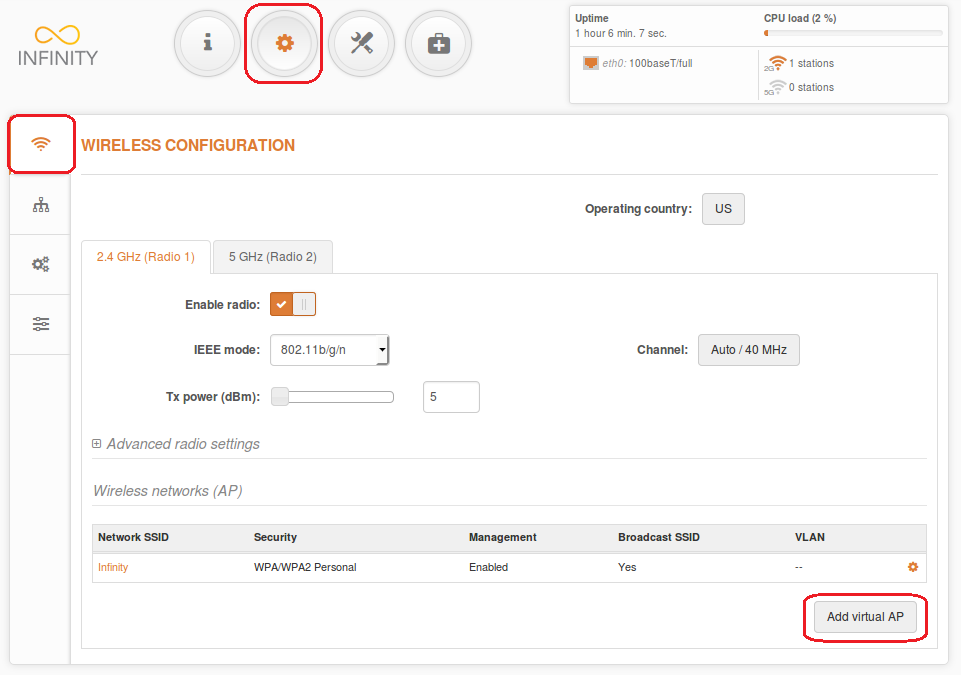
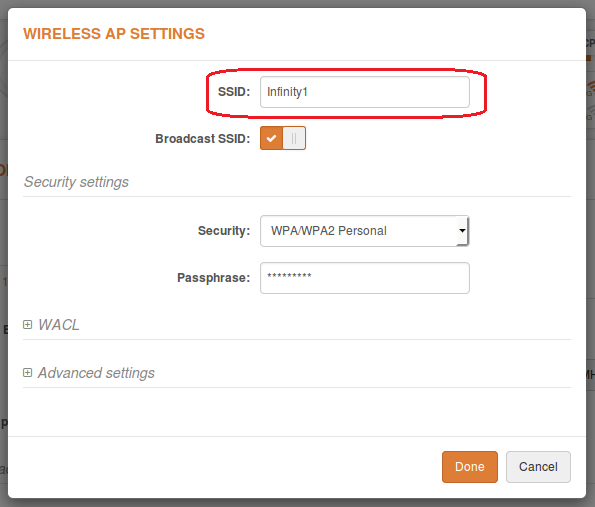
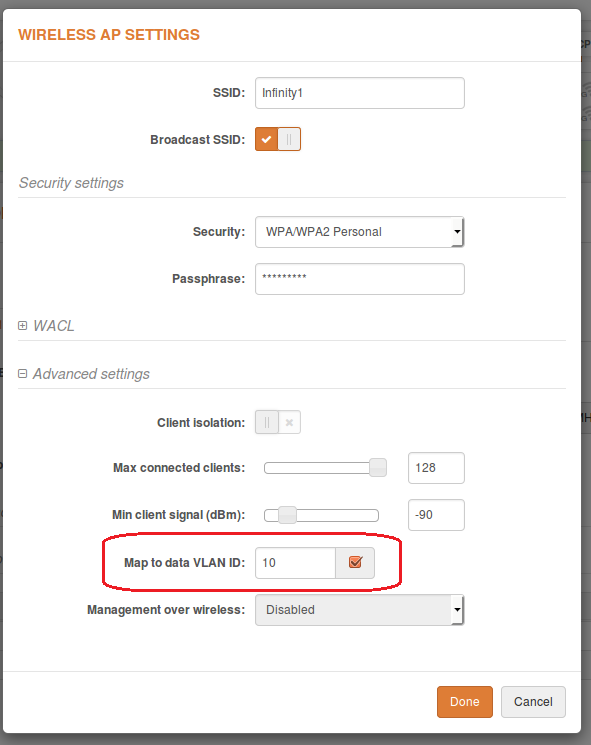
To create a new Virtual AP, click Add Virtual AP and specify the required parameters.
- SSID – specify the unique name for the VAP [string].
- Security – choose the wireless security and encryption method from the drop-down menu.
Advanced Settings:
- Client isolation – select to enable layer 2 isolation, which blocks the clients from communicating with each other.
- Max connected clients – specify the maximum number of wireless clients associated with the AP radio.
- Min client signal (dBm) – if enabled, the AP will drop connections of clients that have signal levels below the configured threshold.
- Map to data VLAN ID – specify the VLAN ID for traffic tagging on particular radio interfaces. Station devices that associate using particular SSIDs will be grouped into the VLAN.
- Management over wireless – controls the wireless administrative access. For security reasons, it is recommended to disable wireless access and instead require a physical network connection using Ethernet for administrative access to the NFT device.
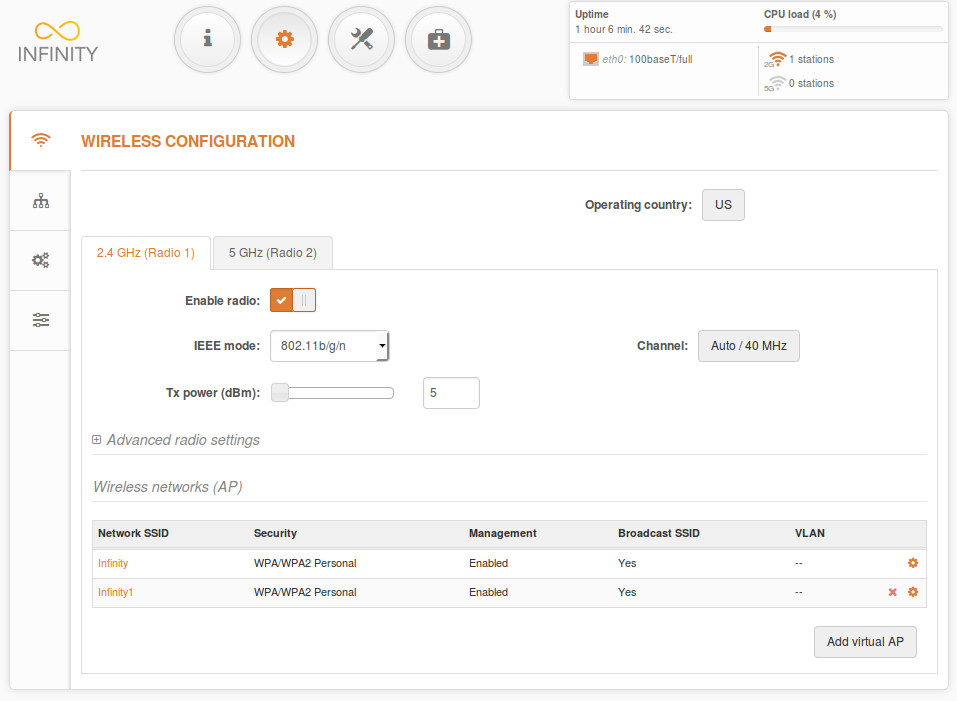
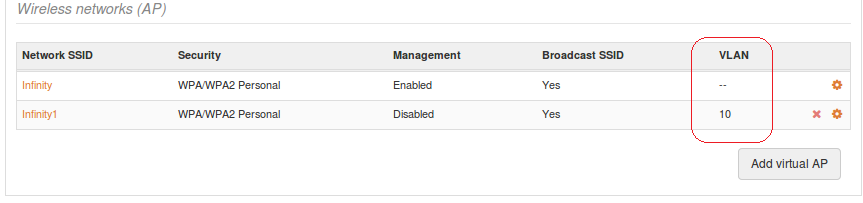
Wireless networks (AP) displays a summary of all virtual radio interfaces running on the NFT device:
Navigate to Status > Information for a configuration summary.
Navigate to Status > Wireless for detailed connected peer statistics.

Map Data VLAN to SSID
Virtual Local Area Networks (VLANs) are logical groupings of network resources.
Map to data VLAN ID – specify the VLAN ID for traffic tagging on particular radio interfaces [2-4095] (radio without VLAN TAG). Station devices that associate using the particular SSID will be grouped to the VLAN.
Wireless networks (AP) displays a summary of all virtual radio interface configurations running on the NFT device:
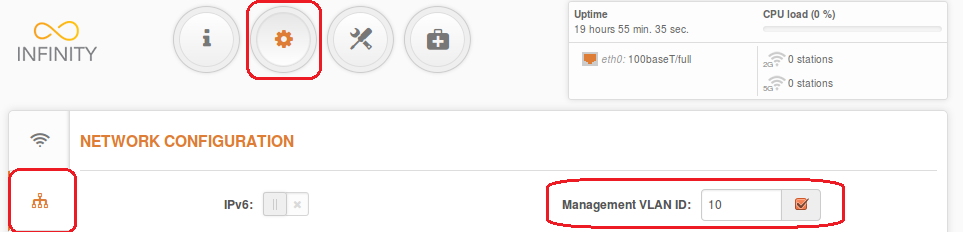
Management VLAN
- Enable management VLAN – enable VLAN tagging for management traffic. Access to the AP for management purposes can be further limited using VLAN tagging. By setting up Management VLAN, the device will only accept management frames that have the appropriate Management VLAN ID. All other frames using any management protocol will be rejected.
- Management VLAN ID – specify the VLAN ID [2-4095]. When the device interfaces are configured with a specific VLAN ID value, only management frames matching the configured VLAN ID will be accepted by the device.
The NFT device can configure WPA/WPA2 Enterprise encryption using RADIUS authentication. A properly configured AP will accept wireless station requests and will send the information to the configured RADIUS server for client authentication.
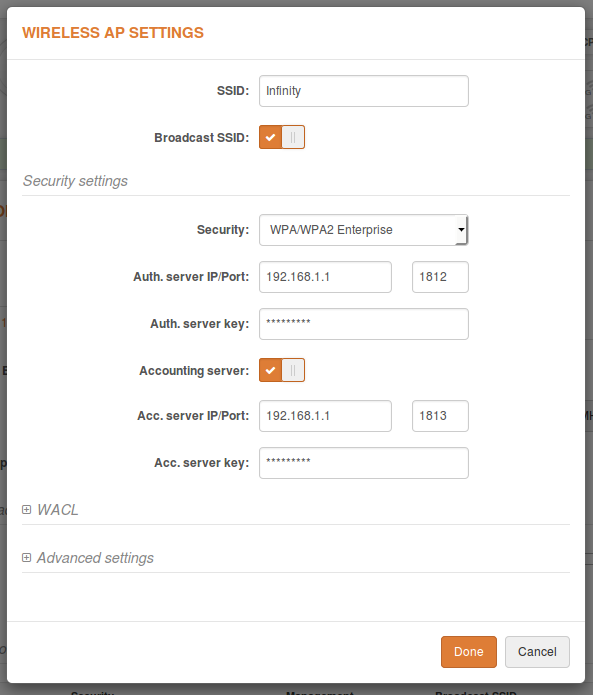
- Auth. server IP/Port – specify the IP address and the port of the authentication RADIUS server to which the authentication requests will be sent.
- Auth. server key – enter the key for authentication on the specified RADIUS server.
- Accounting server – use the slider to enable accounting RADIUS server, if required.
- Acc. server IP/Port – specify the IP address and the port of the accounting RADIUS server, to which accounting stats will be sent.
- Acc. server key – enter the key for the authentication on specified accounting RADIUS server.
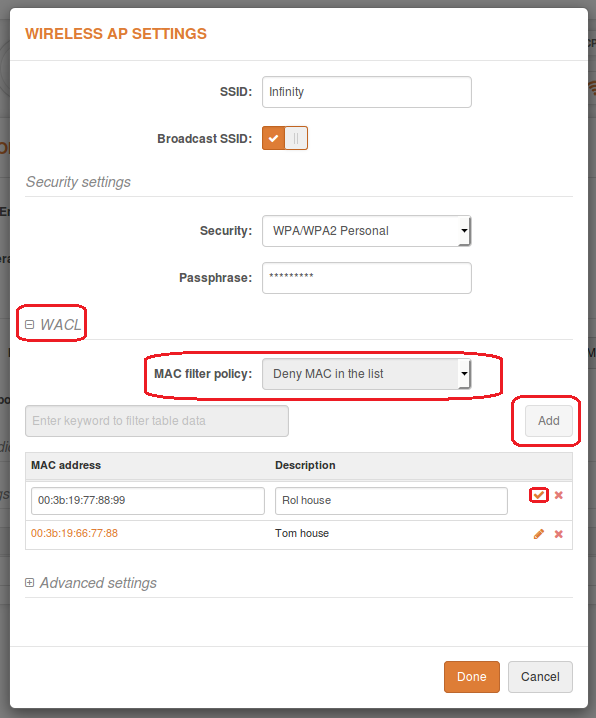
The Wireless Access Control List is an access control based on MAC addresses. Access control allows users to limit wireless associations (based on the MAC address) with APs by creating an Access Control List (ACL). The Wireless Access Control List is found in the Wireless AP settings:

To add a new rule, press Add:
- Open – no rules are applied.
- Allow MAC in the list – select to allow connectivity for devices in the list only (white list).
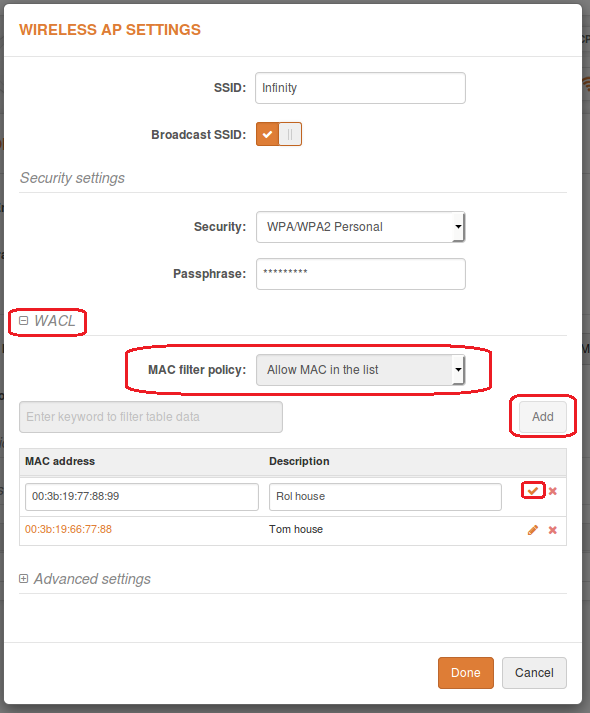
Deny MAC in the list – select to prohibit connection for devices in the list (black list).
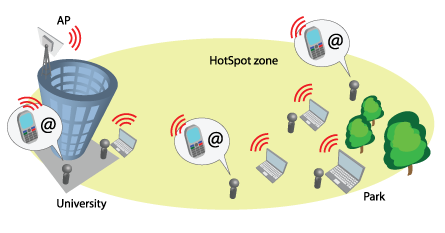
HotSpots are popular in public locations such as airports, shops, bars, or stadiums. The NFT allows user authentication using external or internal web portals. This authentication method is called UAM. Users provide login credentials and then the web portal attempts to authenticate and authorize the client using the provided information. The client will not send any authentication requests directly to the NFT—the web portal will do that. If successful, the NFT will allow access to the Internet. Otherwise, the web portal will display a failure notice.
Follow these steps to configure a Hotspot with UAM authentication using the external web portal for wireless clients:
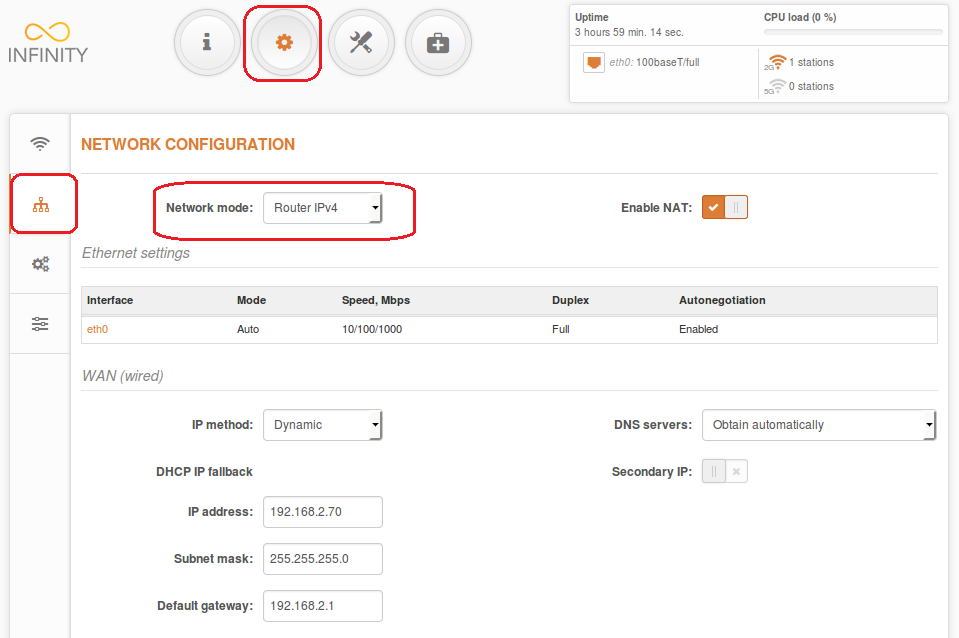
Step 1. Navigate to Configuration > Network and make sure that the NFT is operating as a Router. This is the only way a HotSpot will work with UAM authentication.
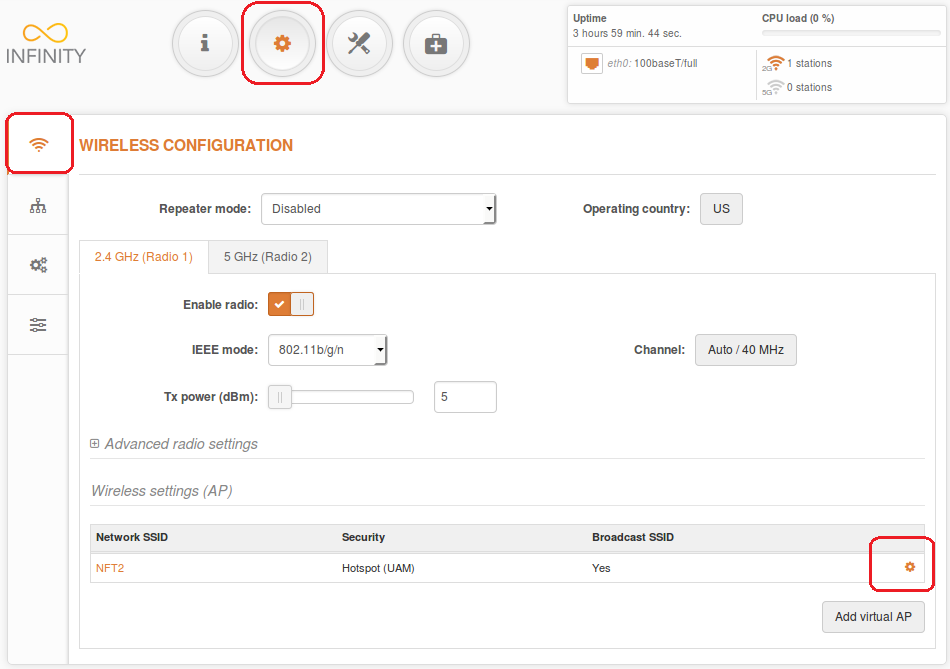
Step 2. Set the channel to Auto and set up the Wireless settings for the HotSpot by clicking on the gear icon:
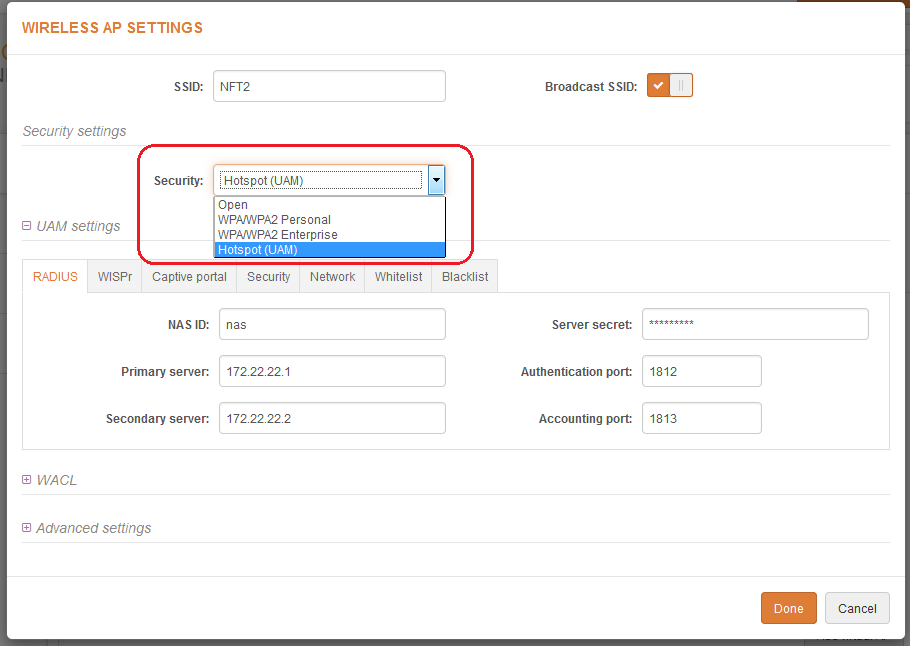
Step 3. Set up the wireless settings for the HotSpot:
- set the SSID.
- set Security to Hotspot (UAM).
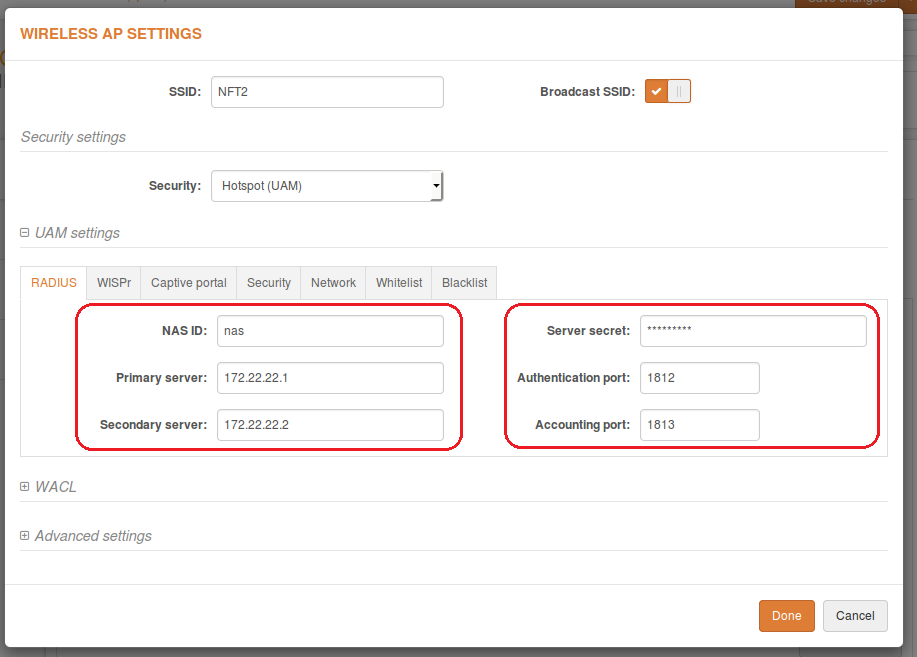
Step 4. Set up at least one RADIUS server by entering the IP address, RADIUS secret, and authentication and accounting ports.
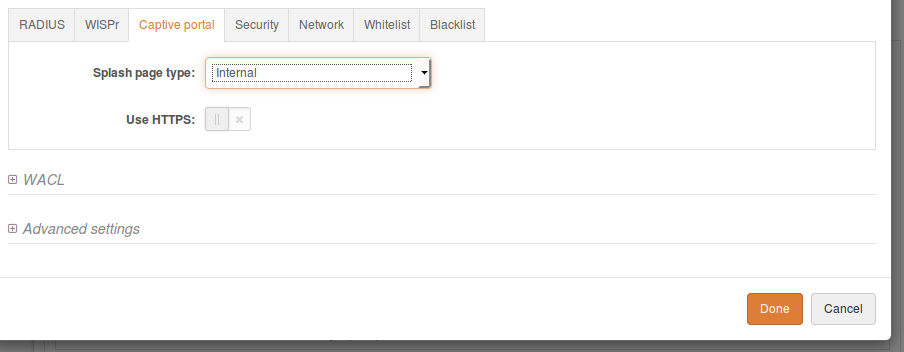
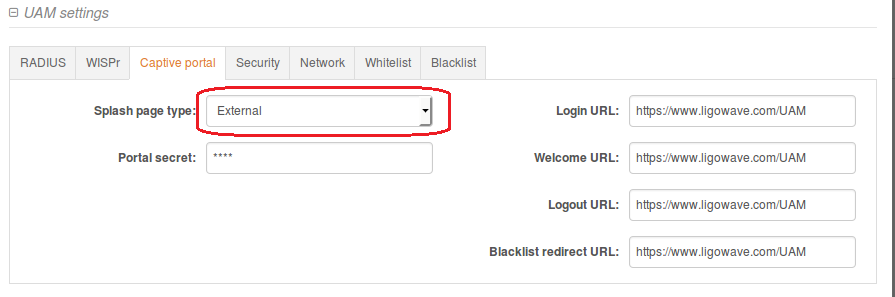
Step 5. Set UAM authentication to Internal or External (hosted on separate web server) web/login page.
Step 6. Fill out the External type UAM fields: login page URL, welcome page URL, logout URL, and blacklist URL:
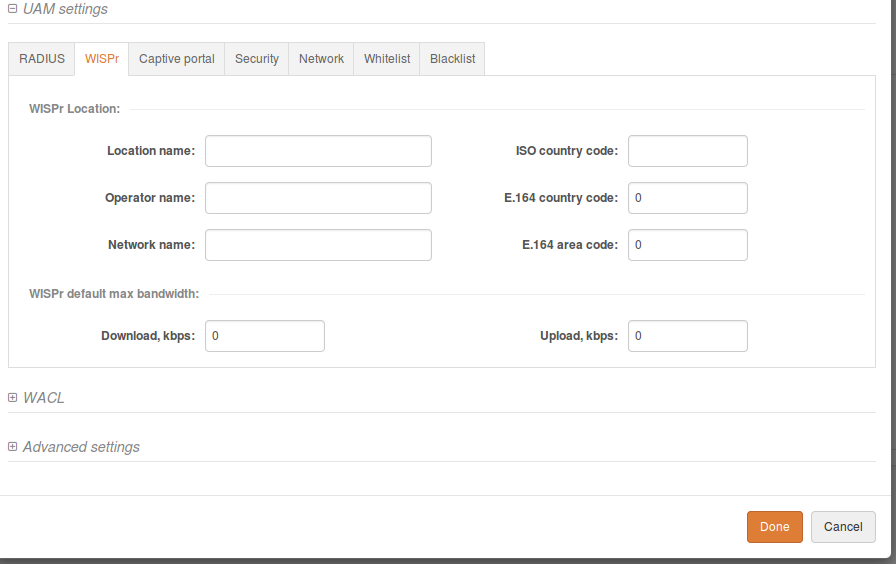
Step 7. UAM supports HotSpot descriptions based on WISPr 1.0 recommendation: WISPr location name, operator name, network name, ISO country code, E.164 country code, and E.164 area code. UAM also supports traffic limitation and has fields for default bandwidth definitions. These parameters and attributes can be overridden per user from the RADIUS server.
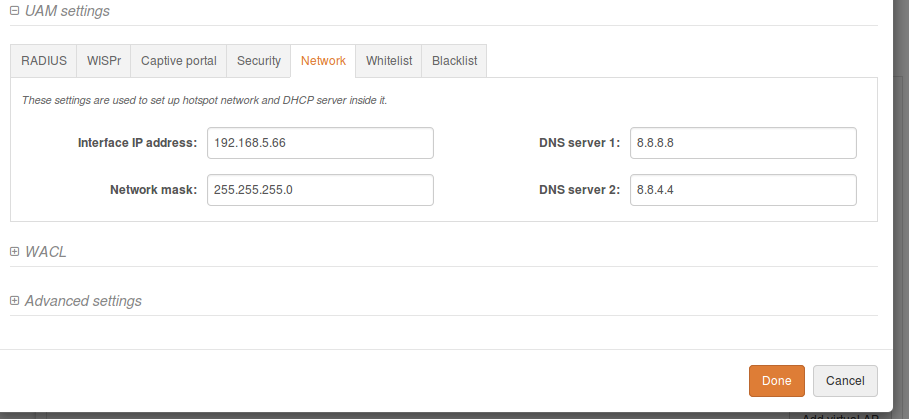
Step 8. Set up the UAM interface IP address and the entire network for UAM clients:
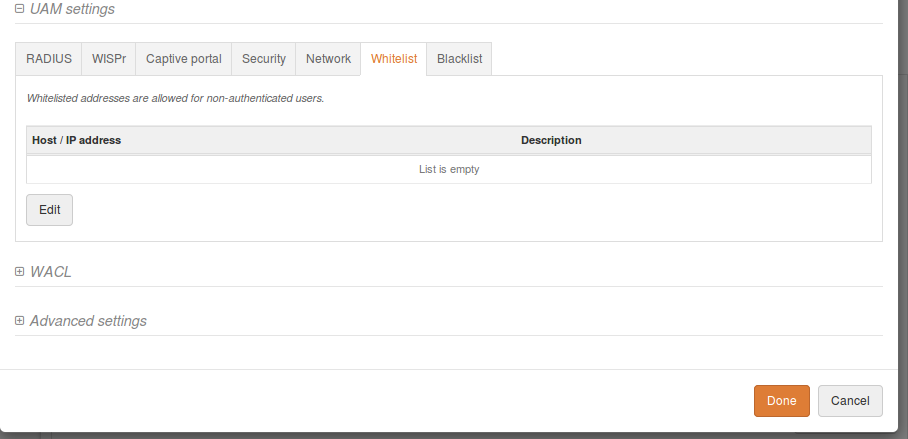
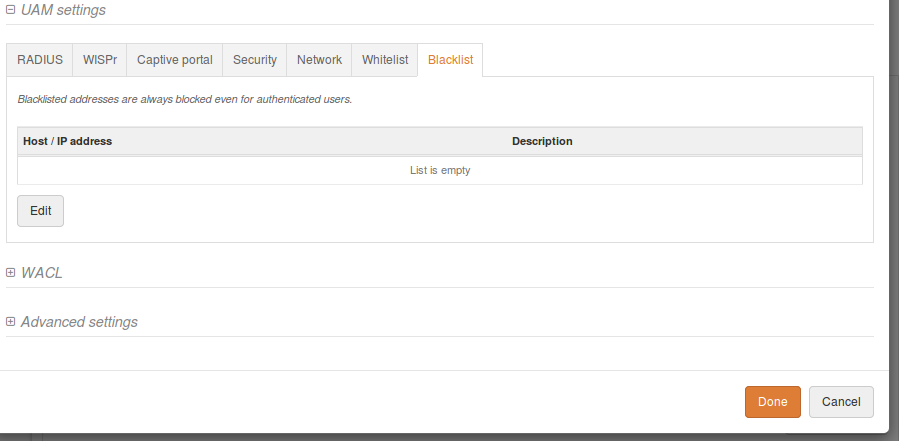
Step 9. UAM supports whitelists and blacklists, which can be configured locally on the device:
Step 10. Once UAM authentication is successfully configured on the NFT device, all wireless clients will be redirected to the internal or external web portal for authentication.
Use the Access Point Repeater mode to extend the range of the existing network.
The AP repeater’s wireless settings can scan the SSIDs of surrounding APs and choose the required one. Devices automatically enable WDS, when the main AP is working in WDS mode. Do not forget to add security information, which is needed to connect to the main AP. Also, the country code should be the same on all devices.
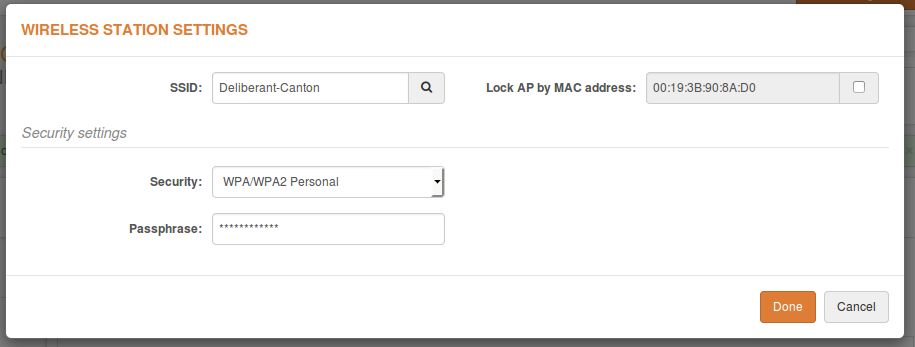
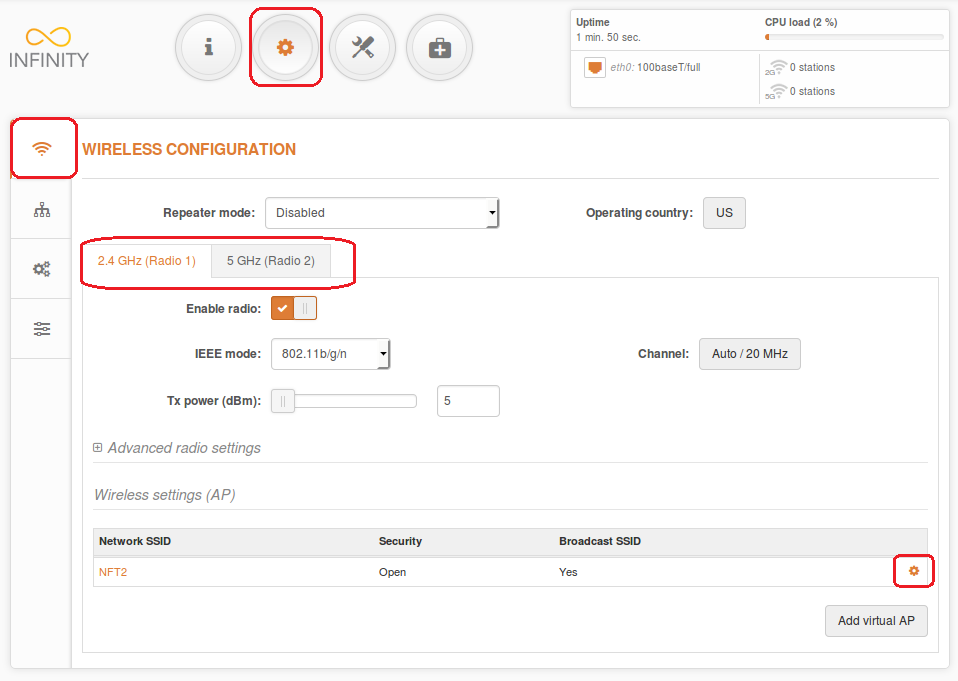
Step 1. An AP SSID and security information can be added or a new Virtual AP can be created in the Wireless Configuration settings:
Step 2. Set the Wireless mode to Access Point Repeater:

Step 3. Navigate to Repeater settings (Peer AP):
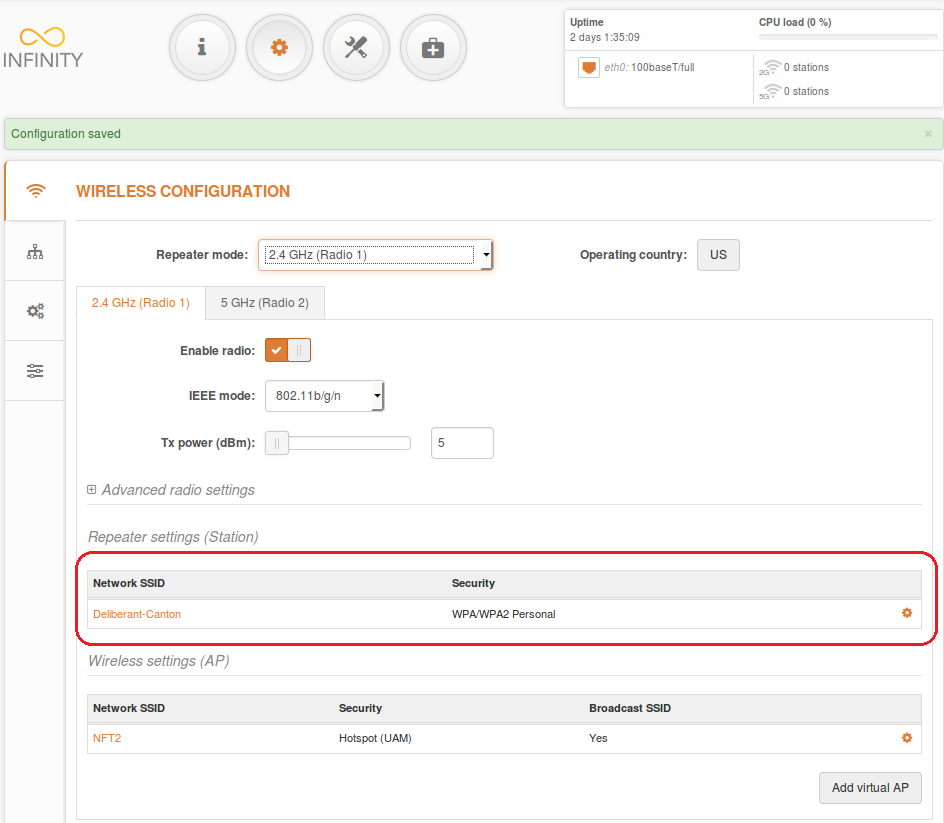
Step 4. Scan and choose the AP SSID, which is going to be repeated.
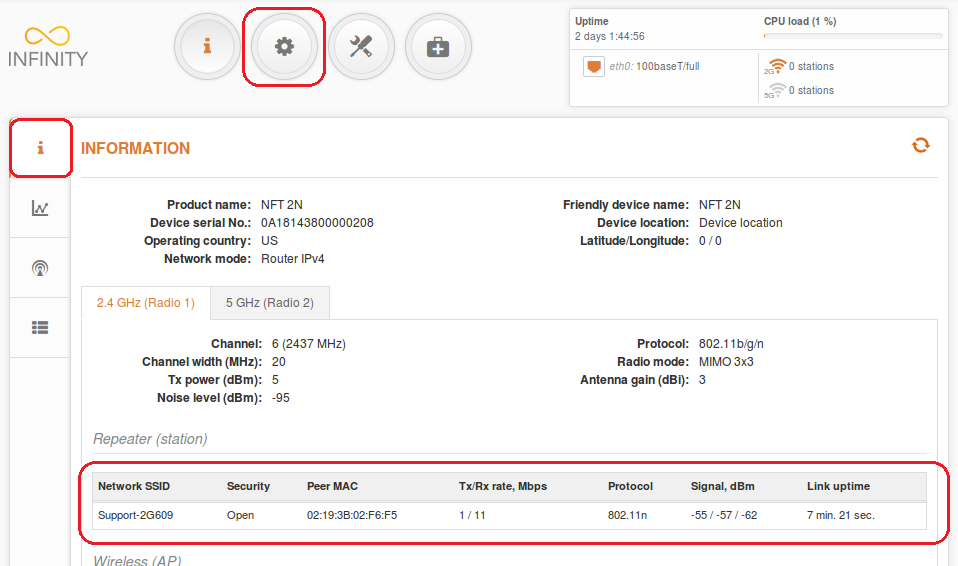
Step 5. Verify that the Repeater Peer is properly connected to Main AP:
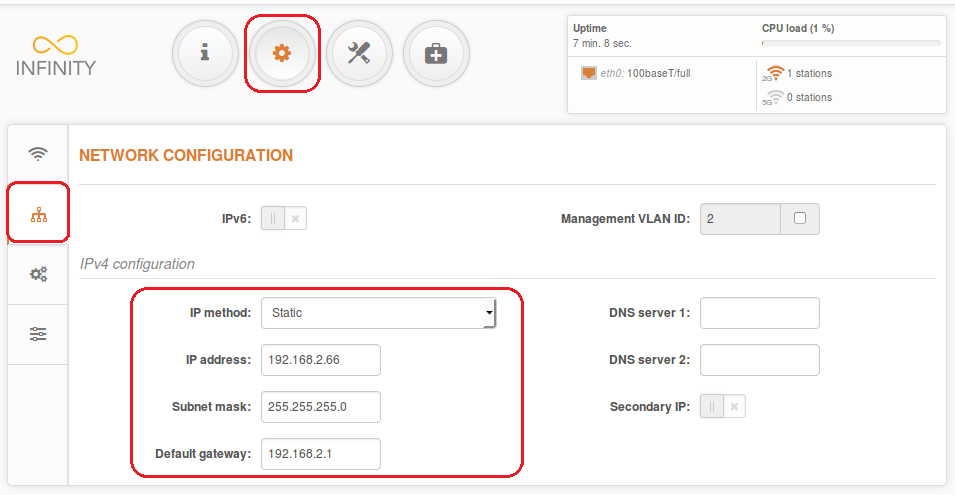
Enter the device’s IP address (default: 192.168.2.66) into the web browser’s IP field and specify the default login credentials admin/admin01.
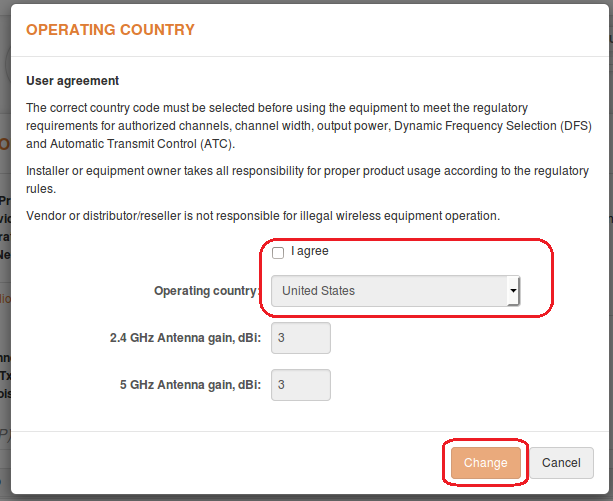
Confirm the user agreement. Regulatory domain settings may differ depending on the selected country. You are not allowed to select radio channels and RF output power values other than the values permitted in your country and regulatory domain.
Once the administrator is successfully logged in, the device’s main web management interface page will be accessed. The device will not be ready for configuration.
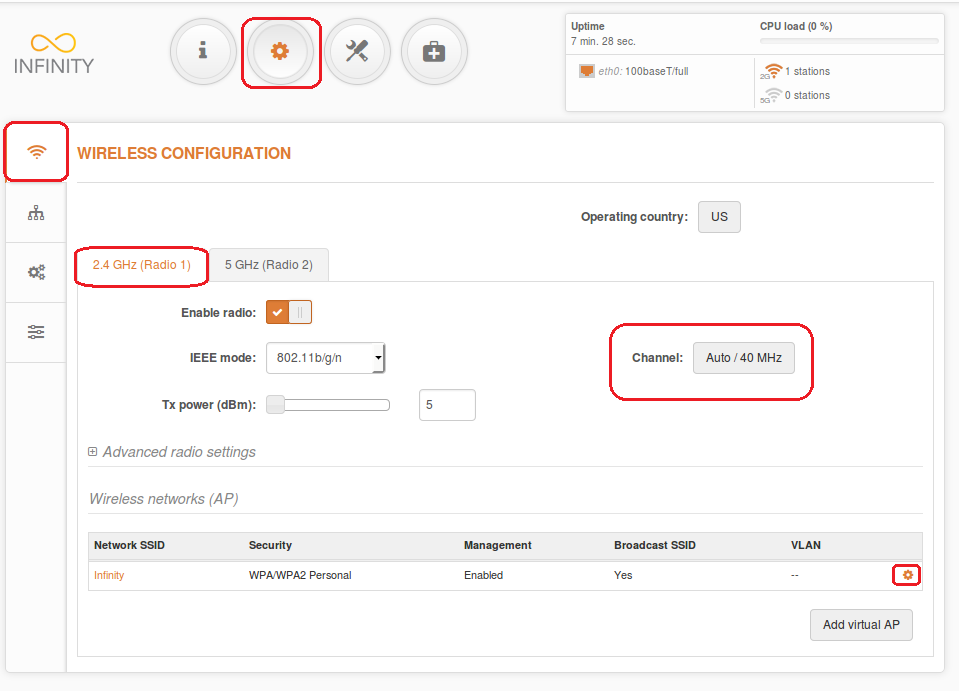
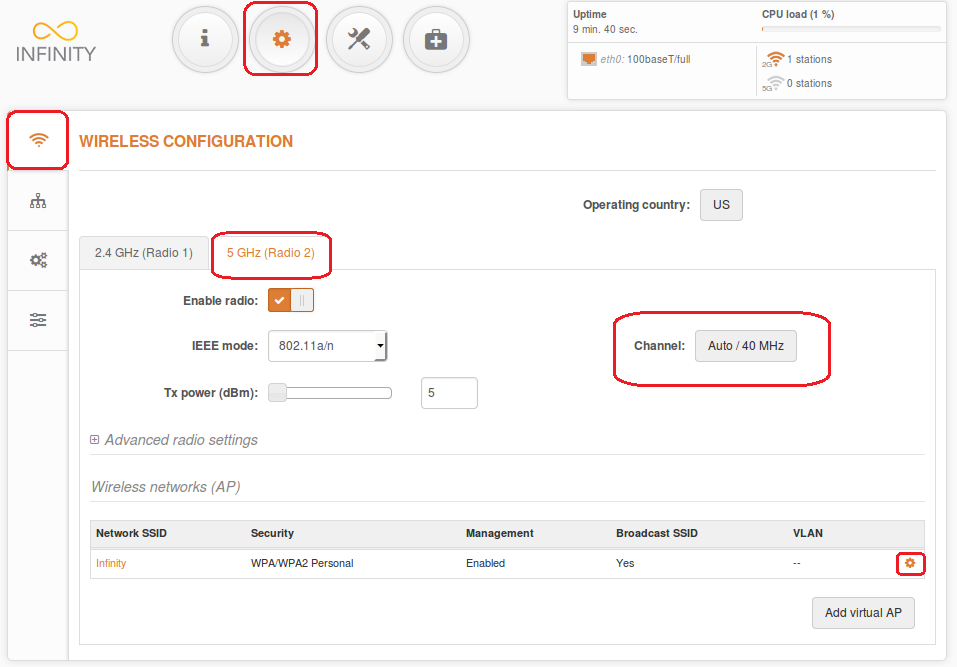
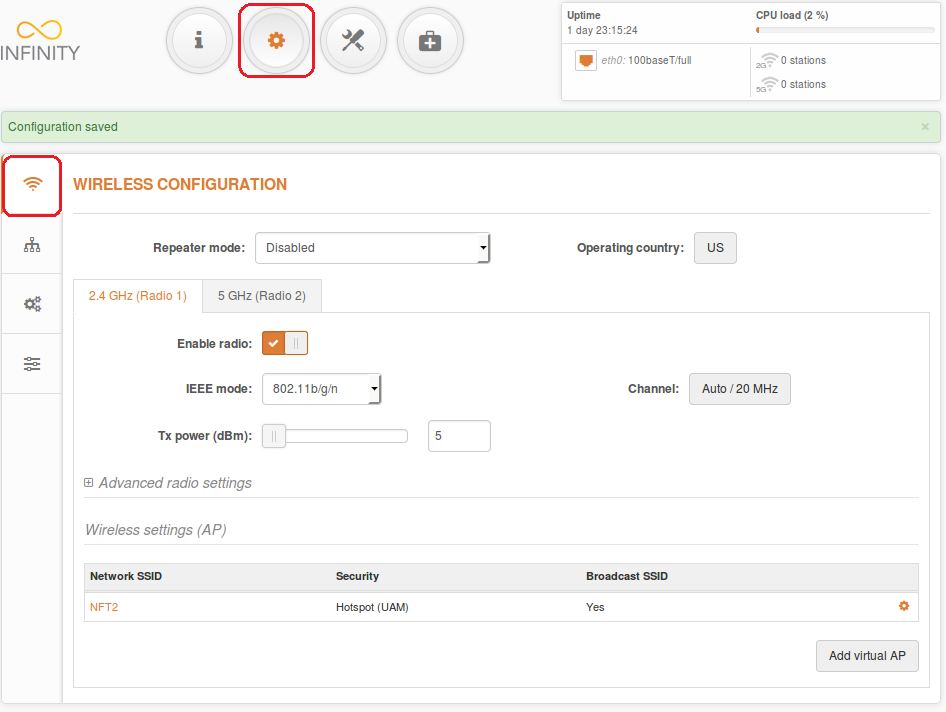
Navigate to Settings > Wireless Configuration and establish wireless settings for the 2.4GHz and 5GHz AP:
- NFT 2N wireless mode is set to Access Point (auto WDS) and it cannot be configured;
- select IEEE mode:
- N, if 802.11n-capable radios are used;
- B/G/N mixed, if legacy radios are also used in the network;
- set Channel to Auto.
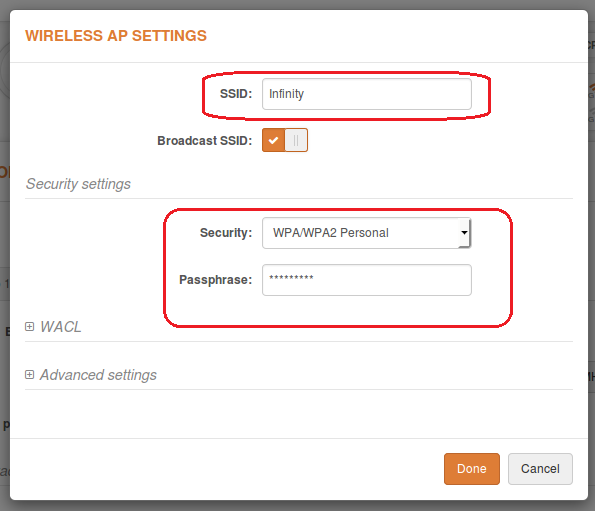
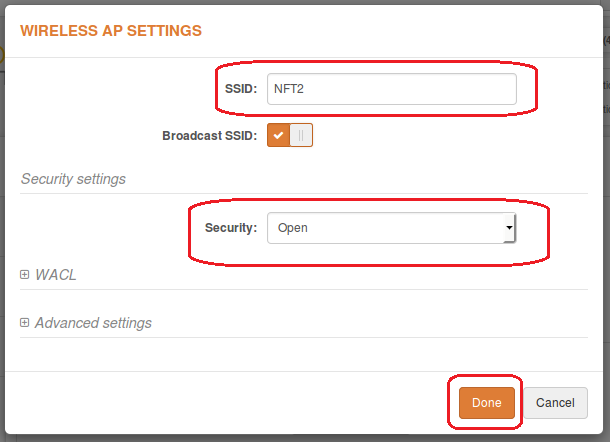
Set Wireless AP Settings. First of all, set the SSID and enable Security for secure traffic over the link. All other settings should be left as their default values:
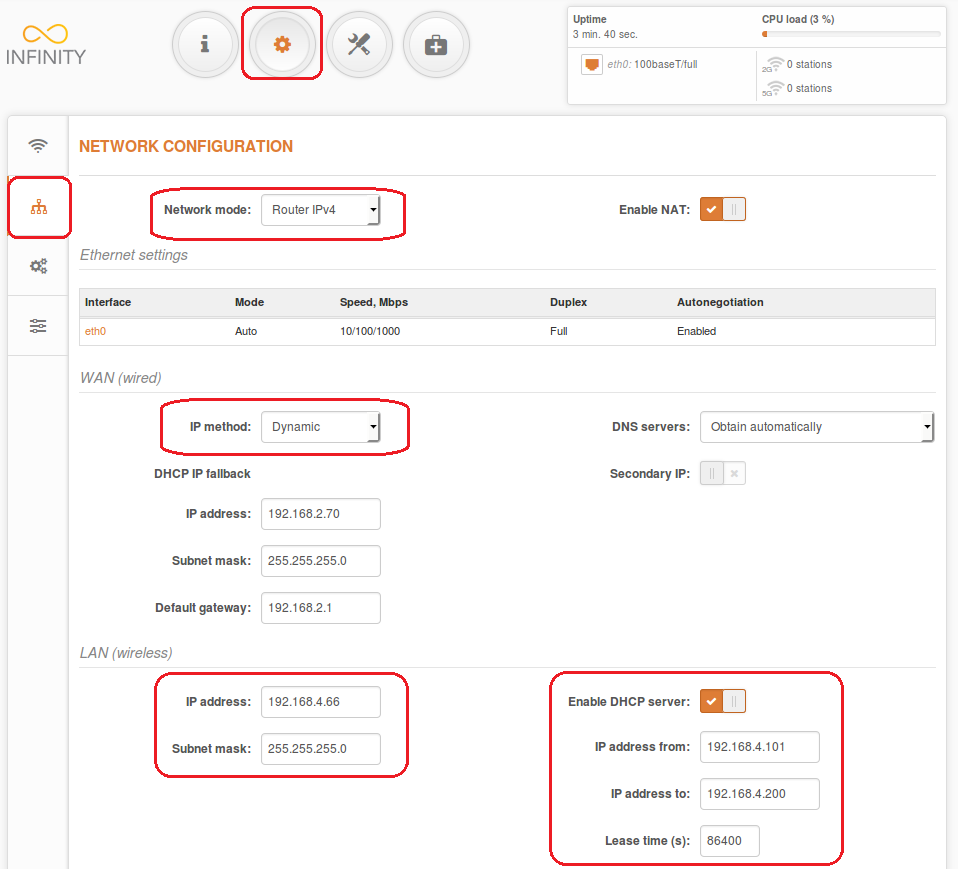
Set Router Mode. This section allows users to customize router parameters to suit the needs of the network, including the ability to use a built-in DHCP server. When the device is configured to operate as a router, the following sections should be configured: WAN (wired) network settings, LAN (wireless) network settings, and DHCP server settings.
- change the device’s default IP address (can be static or dynamic);
- enable IP alias (secondary IP), if necessary;
- the default IP address can be left unchanged because it is used for device management.
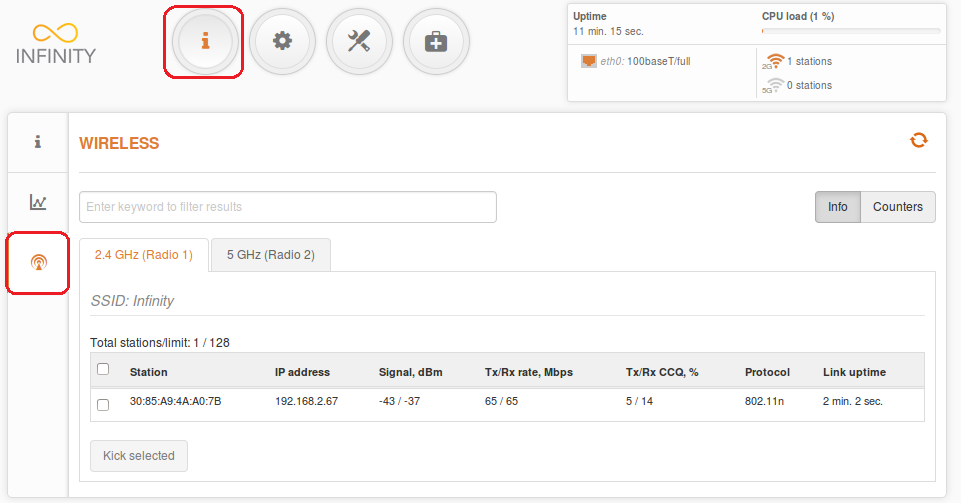
Verify client connection status. Navigate to Status > Wireless Networks. The information page provides wireless information on the link. The connection quality of the connected station is also displayed.
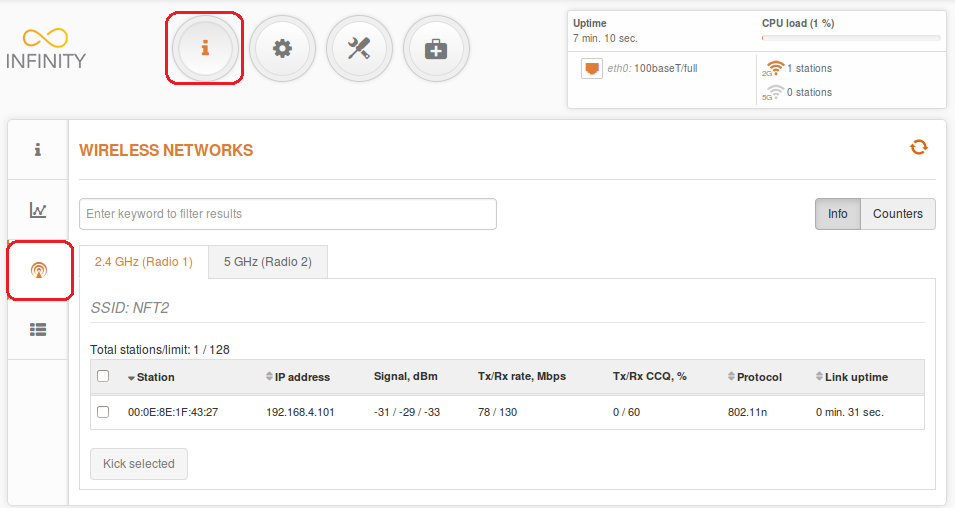
DHCP client count and a detailed list are provided in Status > Network.