Introduction
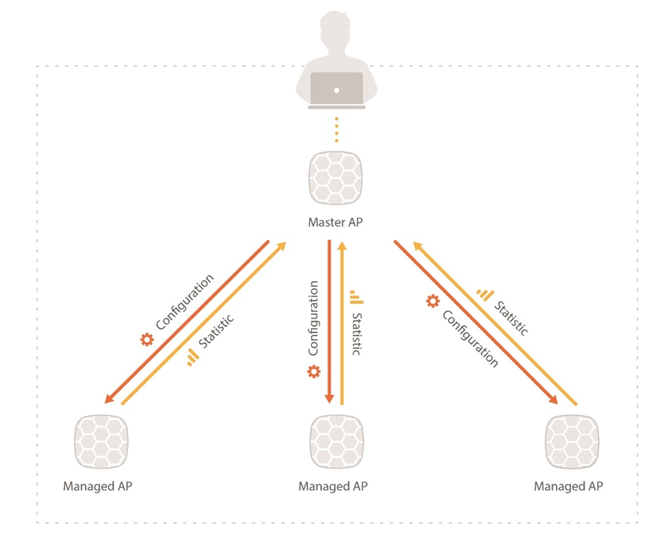
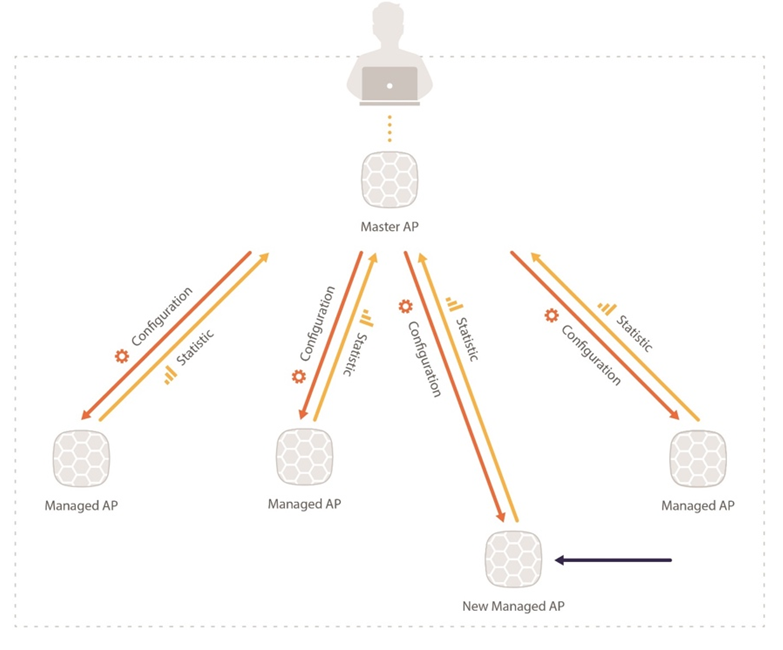
In this scenario, the first device will be designated to act as the control unit, called the Master AP. It will automatically configure each new device connected to the same network (subnet), thus creating a self-configuring Infinity Controller system. There is no need to install any management software—configuration is done on the Master AP only and then it is applied to all devices on the network.
Once a new out-of-the-box device connects to the network, the Master AP will upload the configuration for each Managed AP onto the network. The setup of a custom configuration is made on the Master AP web management system and the same parameters will be assigned to each device connected to the same network automatically, thus creating centralized configuration from a single device.
Integrated Infinity Controller system requirements:
- one device operating as the Master AP and other devices operating as Managed APs;
- all devices present on the same network;
- DHCP server running on the network.
Setup of New Master AP
To set up the Integrated Infinity Controller system, first configure the Master AP. All of the parameters that are configured on the Master AP are automatically applied to all Managed APs connected to the same network.
Follow these steps for quick Master AP configuration using the initial setup wizard:
Step 1. Connect the PC to the device using Ethernet.
Step 2. Launch the web browser.
Step 3. Enter the device’s IP address in the web browser’s IP field and enter the default login settings (admin/admin01).
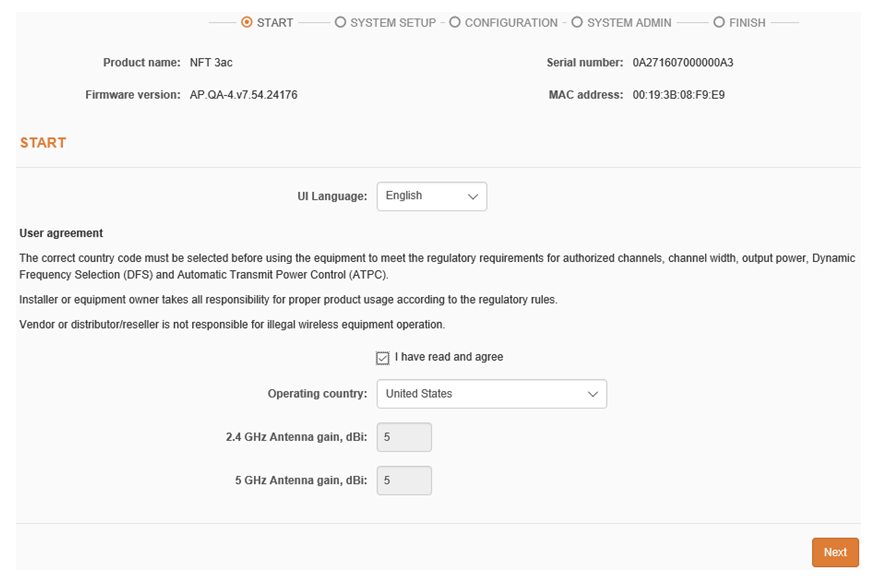
Step 4. Below is the initial screen, presenting the user agreement and some options. Agree to the user agreement, select the operating country, and set the radio channels and RF output power values permitted in the selected country and regulatory domain. Then, click Next.
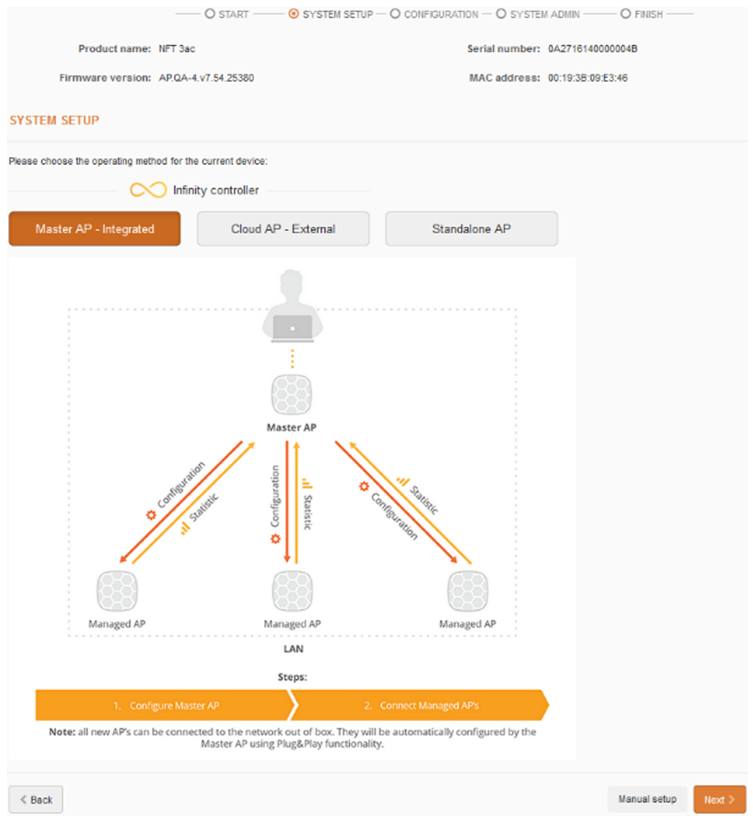
Step 5. Set the device’s operating mode to Master AP – Integrated and click Next:
Step 6. Set the following parameters for the Master AP and click Next:
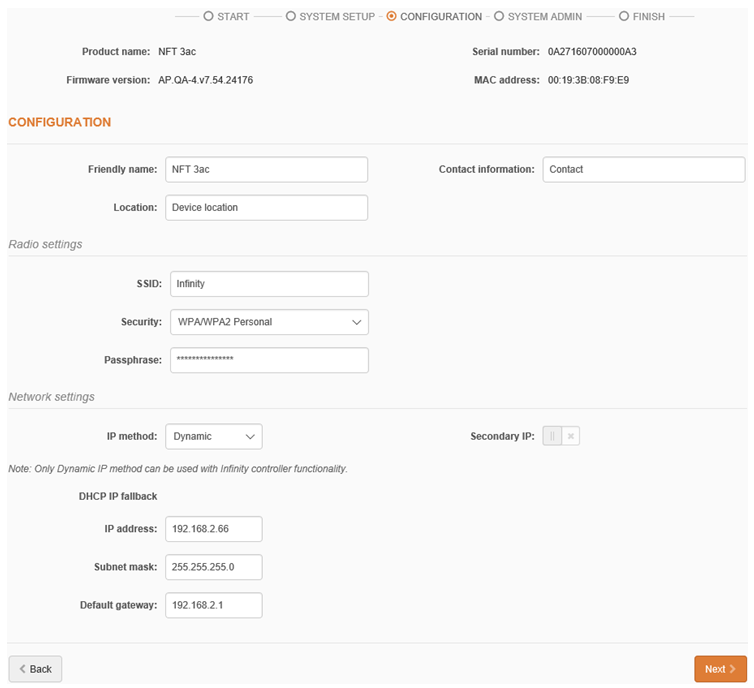
- Friendly device name – provide a meaningful identifying name to the device.
- Contact information – provide the name of the person to contact regarding the device (such as a network administrator).
- Device location – briefly describe the location of the device.
- SSID – specify the SSID of the wireless network.
- Security – set up the security for the Integrated Infinity Controller’s system (WPA/WPA2 Personal, WPA/WPA2 Enterprise).
- IP settings – set the device to operate under the Dynamic IP mode (if not already set up) as the Integrated Infinity Controller requires dynamic IP assignment for all units.
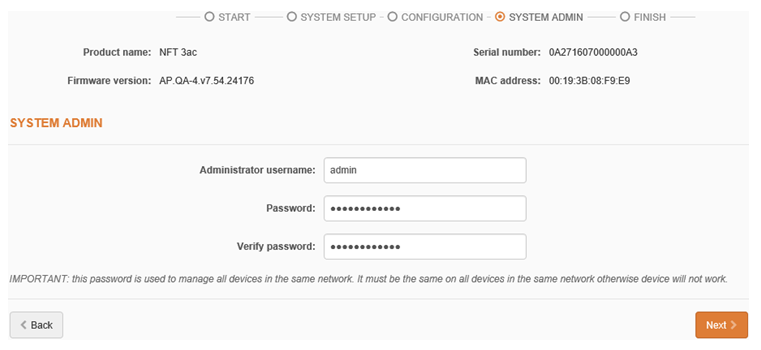
Step 7. Set the administrator’s username and password and then click Next:
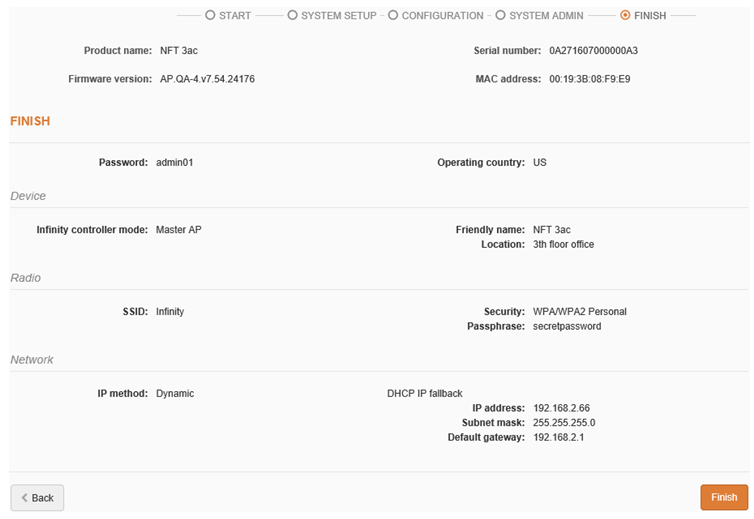
Step 8. Verify the Master AP configuration and click Finish to conclude the setup:
To change other parameters not included in the Quick Setup Wizard, navigate the GUI appropriately and change the desired parameters. All settings changed on the Master AP will be automatically uploaded to all of the Managed APs in the Infinity Controller’s network.
Adding a New Managed AP
If the user wishes to increase the number of devices within the network or to replace an existing one (due to malfunctions), simply power up a new device out-of-the-box and connect it to the network. It will be automatically added to the Integrated Infinity Controller’s system using Plug & Play.
Replacing the Master AP
If the Master AP goes down, all of the Managed APs will continue to function independently. To make the Infinity Controller network full again, simply install and configure a new devices to function as the Master AP.
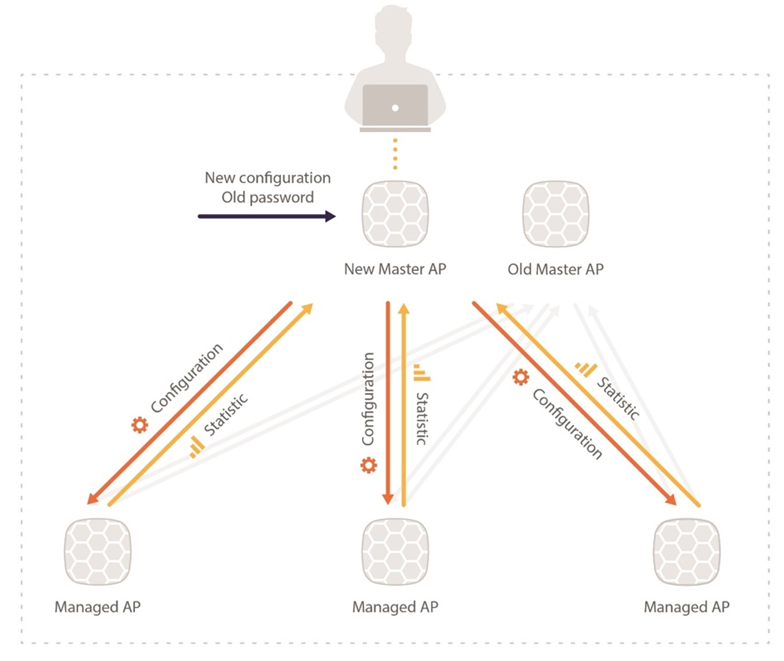
How to replace the Master AP:
- Connect the new AP directly to the computer using the UTP cable. The default device IP is provided by the DHCP server and falls back to 192.168.2.66, if necessary.
- Power up the device.
- Connect to the device over the web management interface and set up the Master AP.
- Connect the configured Master AP to the network.
- All of the Managed APs will connect to the new Master AP automatically.
Control Managed APs
To view and manage the Infinity Controller’s devices, log on to the Master AP’s web management interface and navigate to the Controller menu:

The following are the Master AP’s Internal Infinity Controller settings:

- Enable Infinity Controller – enables or disables all Infinity Controller functionality.
- Operating mode – displays the operating mode of the unit:
- Master AP – if enabled, the device controls all Managed APs operating on the network (the current operating mode).
- Managed AP – if enabled, the unit will wait for automatic configuration from the Master AP running on the network.
- Cloud AP – if enabled, the unit will wait for automatic configuration from the registered External Infinity Controller.
- Managed AP table – displays all of the managed APs connected to the current Integrated Infinity Controller network.
Managed AP Table
This table displays all of the Managed APs found on the network. Active units are indicated in orange, while inactive Managed APs are displayed in grey:

Users can change some Managed AP parameters individually. To load the individual settings, click on the configuration (gear) icon.
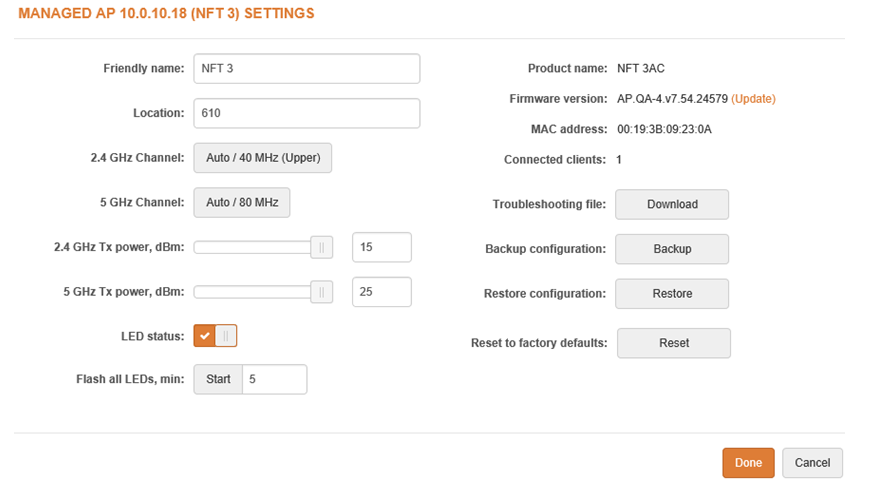
- Friendly name – a meaningful device name used to easily identify it.
- Location – briefly describe the physical location of the unit.
- Channel – displays what channel the AP is operating on or that the auto-channel function is enabled. Click the button to configure the channel.
- Tx power, dBm – control the unit’s radio transmitting power.
- LED status – enable or disable all LEDs. If disabled, LEDs will not light up on the unit.
- Flash LEDs – use this function to identify a particular unit. Once enabled, all LEDs of the unit will flash for 5 minutes (changeable parameter) thus helping identify the location of the unit in the area.
- Connected clients – displays the number of connected client to this particular Managed AP.
- Troubleshooting file – generate and download a troubleshoot file with device’s status information which may help in resolving support issues.
- Backup configuration – click to download current configuration file. The configuration file is useful to restore a configuration in case of a device misconfiguration or to upload a standard configuration to multiple devices without the need to manually configure each device through the web interface.
- Restore configuration – click to upload an existing configuration file to the device.
- Reset to factory defaults – click to restore unit’s factory configuration.
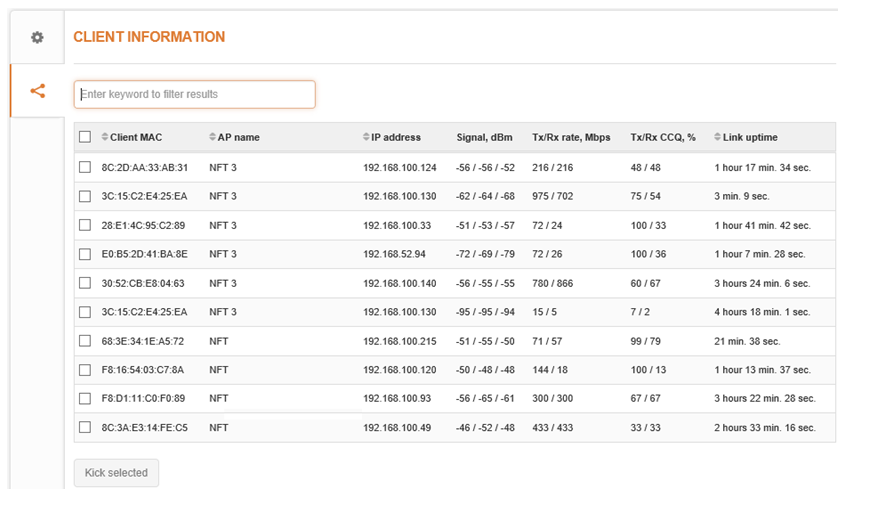
Wireless Clients Table
To view the wireless clients connected to each master AP and Managed AP, navigate to Controller > Client Information: